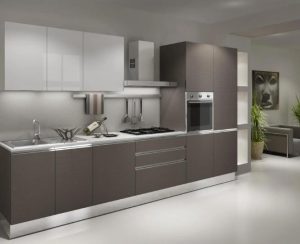
When it comes to designing a kitchen, cabinets are a crucial element. They not only add to the overall appearance but also provide ample storage space. As a result, customers often approach kitchen cabinet manufacturers with a picture of their ideal kitchen cabinet design. While this is a good starting point, it is equally important to understand how kitchen cabinets are made to appreciate the entire manufacturing process.
Step 1: Cabinets Splitting List The kitchen cabinet manufacturing process starts with the cabinets splitting list or design. The designer finalizes the design and layout of the kitchen cabinets through CAD drawings. These CAD drawings are then sent to the production department through software for evaluation and analysis. Based on the specifications, the components of the kitchen cabinets are produced, including the size of the cabinets, types of side panels, cabinet boxes, hardware, screws, holes, and other project requirements.
Step 2: Materials Preparing Producing high-quality kitchen cabinets starts with sourcing the right materials. Veneer wood and particle board are the most commonly used materials in the kitchen cabinet market due to their hard textures and resistance to temperature and pressure. Composite wood is another material that is often used to make kitchen cabinets more affordable or to comply with environmental requirements. The best adhesive used in making composite wood contains small amounts of formaldehyde for durability and better performance. However, this use of formaldehyde has a negative impact on the environment. Therefore, kitchen cabinet raw materials should be compliant with national environmental protection (Level E1).
Step 3: Cutting An electronic saw is used to cut the boards to their exact sizes. Most large manufacturers use the HP series of the Holzma connected to the CUTRITE and other software. This allows for full automation and digital cutting. Small manufacturers, on the other hand, still use handheld saws in the cutting process to save on costs.
Step 4: Grooving Grooves are created in the panels including the side plate, bottom plate, pull strip, etc. The grooving process allows for the slitting of the bottom plate and side plate. This process is done so that the backplane can be inserted into the side plate and bottom plate in the assembly process. To ensure precise and fast grooving, the sawtooth of the grooving saw is similar to the width of the backing plate.
Step 5: Edge Banding Edge banding is done to cover the raw edges of the sides of the wood to protect it against possible warping and to ensure a smooth finish. Edge banding is often made using PVC, acrylic, ABS, wood, wood veneer, or melamine. High-tech edge-banding machines can finish all four sides of 100 pieces of boards in an hour.
Step 6: Drilling Drilling holes in the right places is a must to ensure the proper assembly of the different components of the kitchen cabinet. Drilling equipment consists of three rows, six rows, etc. In most factories, workers manually install the drill bit and drill distances.
Step 7: PVC Vacuum This process prepares every door panel for gluing and PVC finish application. In the PVC Vacuum process, the door panel undergoes grinding and spraying before being fed into the PVC door making a vacuum membrane press machine for the application of the PVC finish.
Step 8: Lacquered The lacquered process involves a lot of steps and is always done manually. The panels are polished and the edge of the panels is sealed with a primer. The base coat is applied and allowed to dry before sanding is done.
Step 9: Quality Inspect Quality inspection is done at every stage of the production process to ensure all kitchen cabinets adhere to the right specifications. Without quality inspection, there can be a possibility that the kitchen cabinets


